13.1. The window is called through the menu 'Mode -> The layouts of the tiles based on templates'. This window contains templates; you can fill them with specific tiles, set the coverage angle, seam parameters, offset from the base point and cover the current surface. The window remembers its location. The coverage mode exists in this window, and it is also possible to record the filled template and call it for coverage in the main program window.
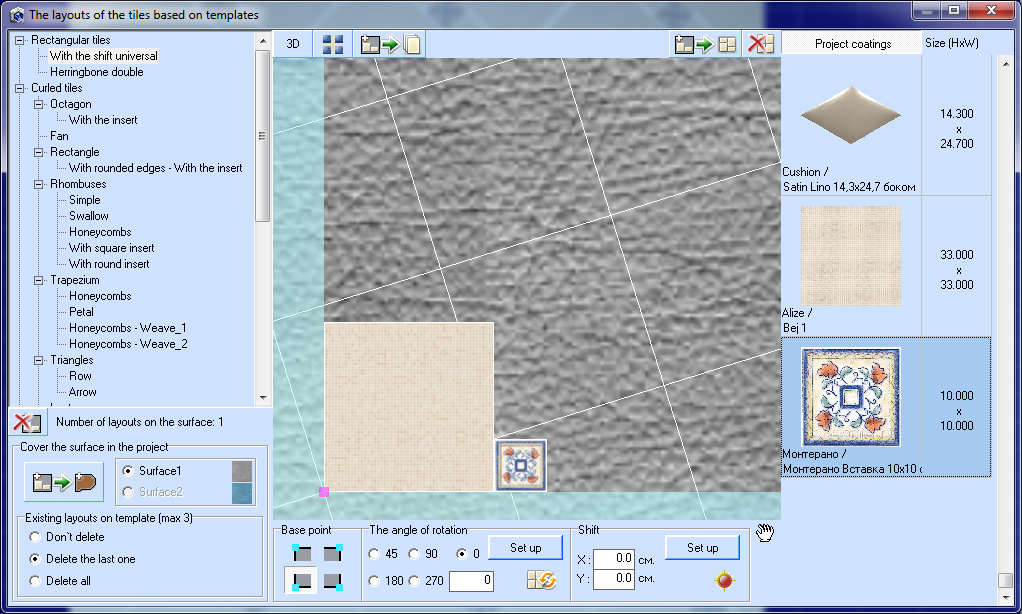
The list of templates is in the left part of the window, it is not editable for the user. It will be updated with new templates in subsequent versions of the program.
In the right part of the window, a list of already added covers to the project is displayed. Double-clicking on the 'Project Coating' button (at the top of the list), you can call up the materials datebase, select and add new covers. When added, they will be automatically added to the project cover directory.
After selecting the template, the filling is done as follows. The first template tile (purple) is highlighted with the left mouse button, while the template tile is highlighted with a red frame, a suitable tile is selected from the list of tiles to the right and a selected tile template is filled with a double-click on it. In this case, the remaining tiles of the template can be filled with the same tile, if possible, or the empty tiles of the template are adjusted to the size of the filled tile. Then select the second template tile (brown) and the action is repeated. The third (blue) is filled in the same way. The color of the fourth template is green. Some identical tiles of the template are filled with only one tile, it is not allowed to fill them with different ones.
Using the buttons 'Base point', you can position the template relative to the base point.
The angle of rotation of the template is specified in the section 'The Angle of rotation'. You can select a fixed value or enter an angle in degrees. The 'Set up' button rotates the template to the desired angle, while the automatic 'attaching' of the template to the boundaries of the quadrant borders.
The offset of the template relative to the base point is specified in the 'Shift' section. The 'Set Up' button moves the template to the specified point.
There is the second way to move the template – using the button ![]() ('Panoramic View'). When the mode is turned on, pressing the left mouse button, the entire scene moves, and if you right-click in this mode, by positioning the cursor on the template, you can move the entire template (while holding down the mouse button). The button
('Panoramic View'). When the mode is turned on, pressing the left mouse button, the entire scene moves, and if you right-click in this mode, by positioning the cursor on the template, you can move the entire template (while holding down the mouse button). The button ![]() positions the template to its original position, attaching to the boundaries of the quadrant. When you turn on the panoramic view, you can not select a template tile to fill or edit it.
positions the template to its original position, attaching to the boundaries of the quadrant. When you turn on the panoramic view, you can not select a template tile to fill or edit it.
The button ![]() is used to rotate the selected tile in the template. The angle of rotation is selected automatically based on the type of tile. If you need to turn a larger angle, press the button again.
is used to rotate the selected tile in the template. The angle of rotation is selected automatically based on the type of tile. If you need to turn a larger angle, press the button again.
The button ![]() below the list of templates is used to clear the template. Selecting another template also clears the current setting of the template tiles.
below the list of templates is used to clear the template. Selecting another template also clears the current setting of the template tiles.
Using the button ![]() you can set such seam parameters as color and width. If you call the form in the single coating mode, these parameters are pre-set the same as this surface. Fill the template to cover the test surface by pressing the button
you can set such seam parameters as color and width. If you call the form in the single coating mode, these parameters are pre-set the same as this surface. Fill the template to cover the test surface by pressing the button ![]() .
.
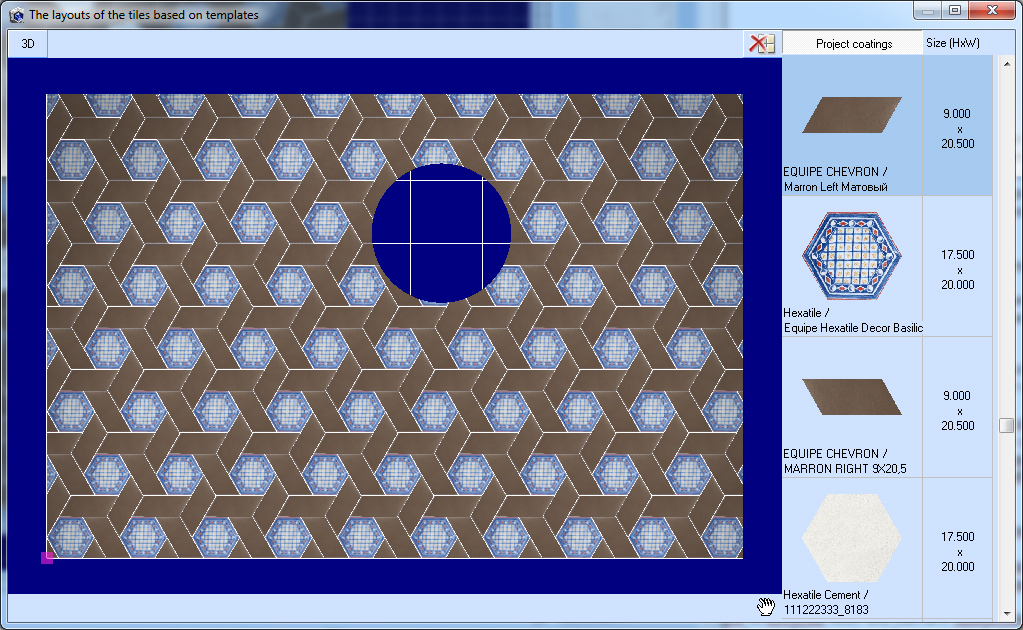
The button ![]() is used to clear the test surface and return to the template editing mode.
is used to clear the test surface and return to the template editing mode.
In order to record a customized layout using the template, use the button ![]() .
.
Layouts are stored in the \Templates subdirectory of the program, the extension of the layout files is *.tpl. Name of the layout is given automatically = The name of the first template tile collection + XXX (three-digit number), you can edit it before recording. The recorded layouts are displayed on the right side of the main program window when the 'Layouts based on templates' button is turned on.
If you call the form in the single coating mode, then in the lower left corner of the window there are options for covering the current surface with a customized layout directly from this window. If you are in the room mode, these options will not be displayed.
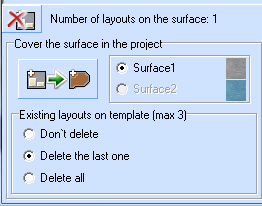 'Number of layouts on the surface' – the system checks how many layouts on the patterns are on the current surface. It is allowed not more than three layouts on one surface. Note that now the whole free surface is covered by default. Therefor the most convenient way to lay two layouts on templates on one surface is to create two surfaces on the wall, or use a 'technological cover' (such as wallpaper), which you can easily remove and continue covering with a second layout.
If two surfaces are created on the wall, the cover can be switched from one to another by the option 'Surface1 / Surface2'.
By selecting 'Do not delete / Delete the last one/ Delete all', you can specify a preliminary operation before covering the layout. The system remembers the sequence of coverage by layouts on templates.
Using the button ![]() , the current surface is covered with the current customized layout with the specified coating parameters. If the surface on the wall has not yet been created, it will be created automatically on the entire wall.
, the current surface is covered with the current customized layout with the specified coating parameters. If the surface on the wall has not yet been created, it will be created automatically on the entire wall.