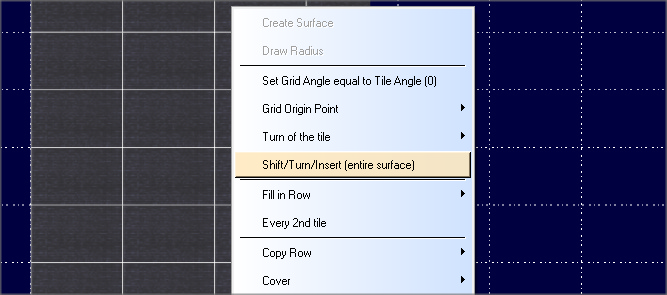
8.15. Shift/Turn/Insert (entire surface). This window combines three modes of operation with tiles on the surface. This mode is called by pressing the right mouse button on the desired surface. In this case, the selected surface is copied to a new window.
8.15.1. Shift of all tiles on the surface.
'Shift' mode is enabled by default. The mode switching buttons are located in the upper right corner of the window. In the 'Shift' mode, you can shift the coating by the selected distance using the 'Left', 'Right', 'Up', 'Down' buttons on the right panel, having previously set the shift distance on the X or Y axis. This mode does not take into account the angle of inclination of the tiles - the X-axis is always directed horizontally, the Y-axis is vertical.
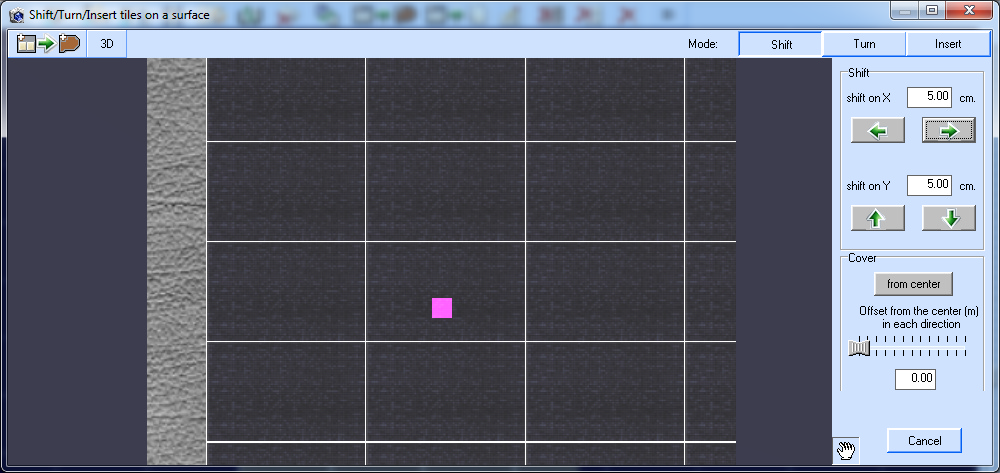
At the same time, if the tiles were 'clipped' by the external (or internal) contour of the surface, then the shift mode for them is carried out correctly (that is, the number of cropped tiles is recalculated). If the tiles as a result of the shift are outside the surface, then they disappear. If an empty space appears as a result of the shift, then it is not filled with tiles, since tiles do not store their history of appearance on the surface.
8.15.2 Rotate all tiles on the surface.
To rotate the tiles, turn on the 'Rotate' mode, set the rotation angle (it will be added to the existing one). In this case, a counterclockwise turn is a turn with a plus sign, if you specify a turn with a minus sign - clockwise. The rules for the existence of tiles during rotation are the same as in the previous mode. All tiles are rotated around the base point, which is set to the center of the plaster by default. You can set the base point to the center of the surface. If the plaster does not occupy the entire surface, then the position of the base point will be different.
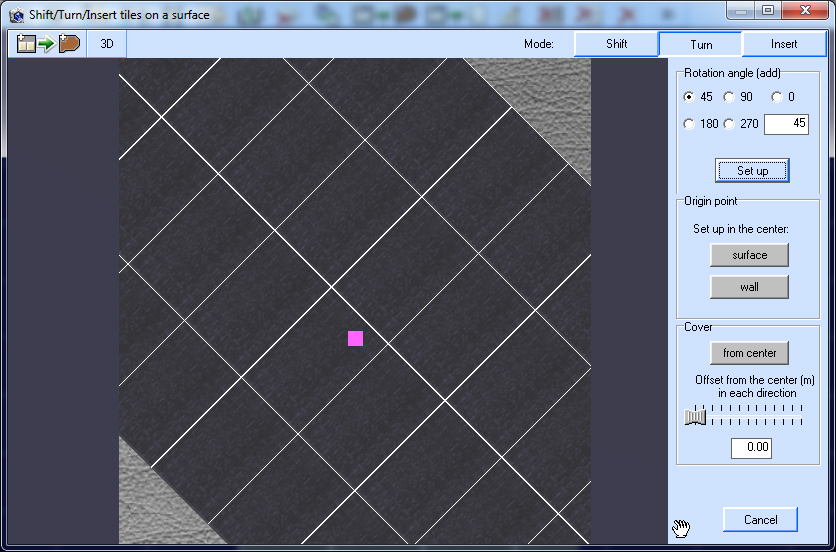
In the 'Shift' and 'Turn' modes, there is a quick 'Cover-> from the center' mode to restore the surface with a simple straight laying. At the same time, the angle of inclination of the tile on the surface is taken into account and laying is carried out based on the position of the base point (in the center of the plaster) in all directions.
You can change the position of the base point using the 'Indent from the center to each side' mechanism - this can help for complete stacking. Paving is carried out on the basis of the row/column on which the base point falls. It also remains possible to edit the tile on the surface using the commands in the main editing window.

8.15.3. Inserting a row/column of tiles, deleting a row/column of tiles.
To insert/delete, select the mode 'Insert'. To select a row/column, right-click on it and select the desired action.
If a row or column is already selected, you can select the delete operation. When deleting, the coverage is shifted from top to bottom (row) and from right to left (column).
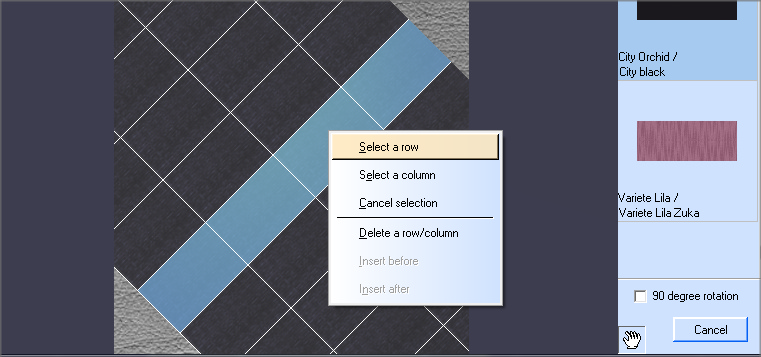
To insert a tile, you must first select it by double-clicking on it in the right window with the list of project tiles. If the required tile is not in the list, you can add it from the tile directory. To do this, double-click on the 'Project Coverage' header and contact the database.

When inserting a row, the entire surface above the inserted row moves up, when inserting a column - to the right. If it is necessary to restore the surface, you can switch to the 'Shift' or 'Turn' mode and use the 'Cover' button. Conditions for the availability of the operation 'Insert' - selected row/column and selected tile. When inserting, it is possible to rotate the tile by 90 degrees (for example, you need to insert the tile vertically - select '90 degree rotation').
Using the ![]() button, you can transfer the edited surface to the project. In this case, the buffer of 'Undo/Redo' operations is cleared.
button, you can transfer the edited surface to the project. In this case, the buffer of 'Undo/Redo' operations is cleared.