4. Block editor is intended to create partitions, podiums, etc. Each of these elements could be created as a block of the certain form. Click on ![]() button to open a block editor.
button to open a block editor.
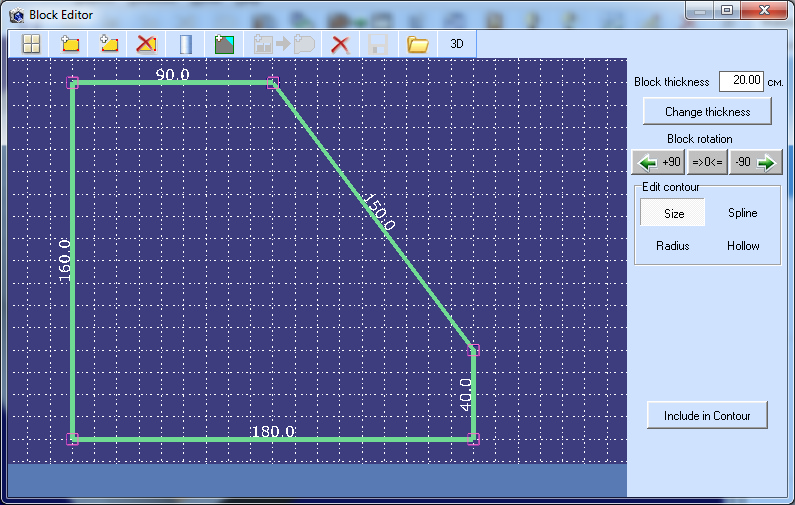
The Block profile is created similarly to the contour of the room. You can change the grid spacing vertically and horizontally or just turn off the grid display. You can set the pitch of the contour of 1 cm thus the grid will remain the same as installed but it will be possible to draw the contour on 'virtual' grid with an accuracy of 1 cm. To close the contour, you can click the left mouse button on the starting point of the contour or click the button ![]() . Another way to close the contour, press Ctrl+E. If you mistakenly set the contour point, you can delete it by pressing Ctrl+Q. Contour editing mode ('Size' mode) is turned on by default and allows you to edit each segment of the contour (see Contour editing). The automatic sizing of the contour is also performed.
. Another way to close the contour, press Ctrl+E. If you mistakenly set the contour point, you can delete it by pressing Ctrl+Q. Contour editing mode ('Size' mode) is turned on by default and allows you to edit each segment of the contour (see Contour editing). The automatic sizing of the contour is also performed.
You can create a column using the ![]() button. Click on this button and draw a circle by holding and releasing the left mouse button. After you release the left mouse button the following window will appear:
button. Click on this button and draw a circle by holding and releasing the left mouse button. After you release the left mouse button the following window will appear:
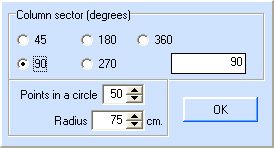
Here you can specify whether you want to create an entire column or a column’s sector of arbitrary angle. Specify a radius and the number of points in a circle, the number of points determines radius smoothness (on how many segments the circle will be divided). In 'Block thickness' field you can set the column height.
After that you can edit the contour using 'Spline', 'Radius' and 'Hollow' buttons. By using the 'Spline' mode, at first you should select a contour’s segment that you want to edit. Then change the segment’s shape by holding and releasing the left mouse button.
The current contour’s segment is displayed in red. You can delete it using the 'Delete selected' button. You can delete all splines using 'Delete all' button. In order to edit the spline again you should select it using the left mouse button.
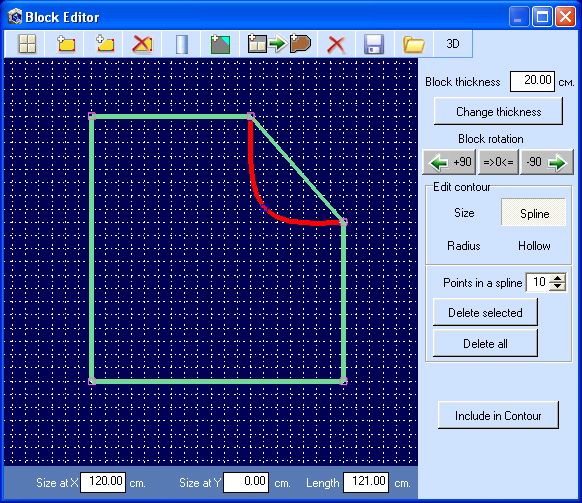
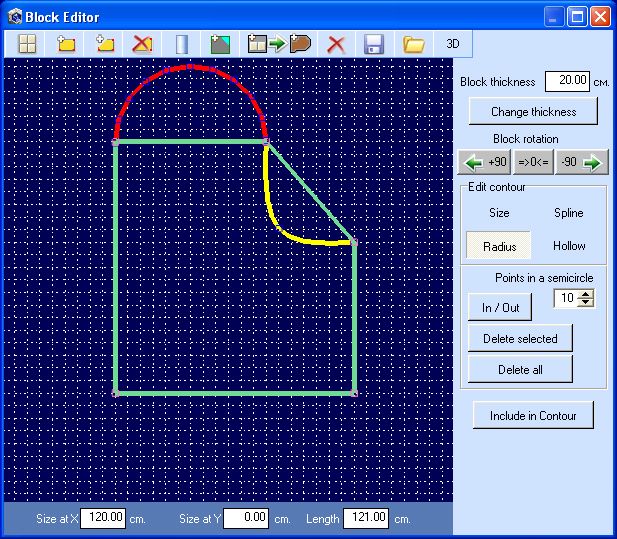
Likewise you can turn any contour’s segment into a radius. Click the 'Radius' button, enter the desired value in the 'Points in a semicircle' field and select the segment. Then an external radius (the radius directed from the contour’s center) will be drawn. Its diameter is equal to the size of the selected segment. If you want to change the radius, you should select it and move the mouse by holding the left mouse button. If you need to create an inner radius, click the 'In/Out' button. This button allows you to change radius position to the opposite. You can edit or delete a radius in the same way as splines. Note that you it is possible to edit or delete a spline only if the 'Spline' button is activated. The same applies to a radius.
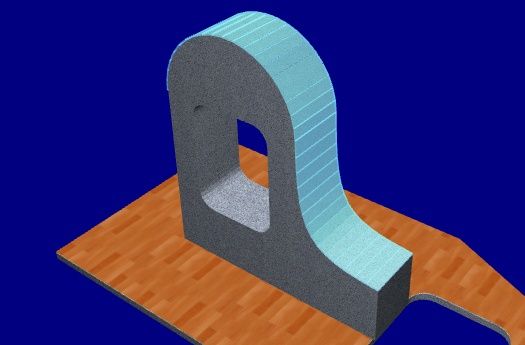
After editing the block’s contour, click on 'Include in Contour' button in order to include the spline/radius in the contour. After that the 'Hollow' mode will be automatically turned on and it will be impossible to edit the contour. In the 'Hollow' mode you can create hollows of four types: rectangular, rectangular with rounded corners, arched and circular (ellipse). All hollows are wall-through. Select the hollow type by clicking the appropriate button. Move the mouse while holding the left mouse button to draw the hollow’s contour. Release the left mouse button to finish drawing the contour. A hollow shouldn’t cross other hollows, wall contour, doors and windows – in that case it will be deleted after you release the left mouse button.
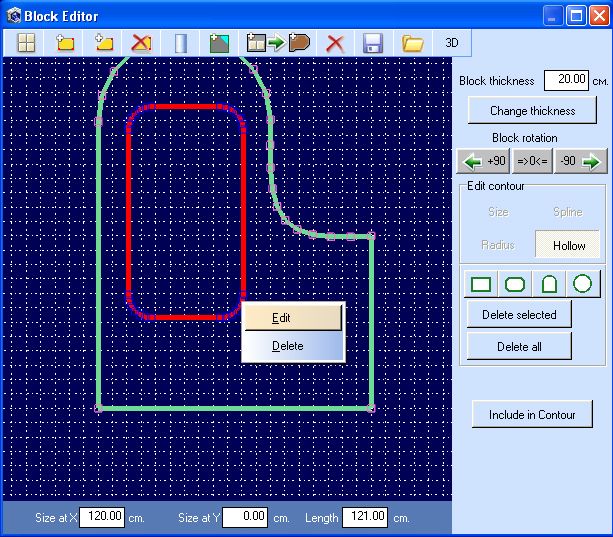
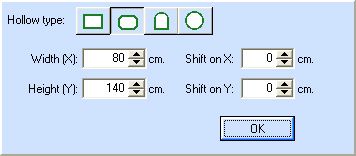
You can select a hollow the same way you select a spline or a radius. If you want to change size or position of a hollow, right-click on it and select 'Edit'. In the appeared window you can change hollow size and move it along X/Y axes.
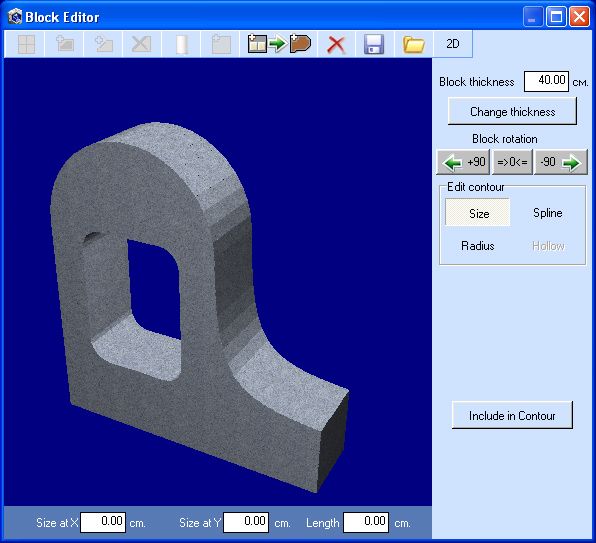
After drawing hollows click on 'Include in the contour' button in order to include hollows in the block. Then set the block thickness in the 'Block thickness' field. Using the 'Change thickness' button it is possible to change the block’s thickness after the block was created. To create a block click on ![]() button. you should switch to 3D mode and set the block’s rotation angle using the
button. you should switch to 3D mode and set the block’s rotation angle using the ![]() buttons. Using the
buttons. Using the ![]() button you can save a block in order to use it in your project. The block is saved as a file with *.blk extension in the ..\Bloсks\ subdirectory of the program’s main directory. By clicking on
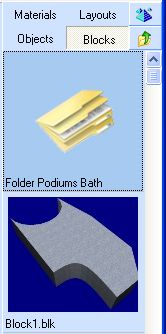
button you can save a block in order to use it in your project. The block is saved as a file with *.blk extension in the ..\Bloсks\ subdirectory of the program’s main directory. By clicking on ![]() button you can load the saved block from this subdirectory.
button you can load the saved block from this subdirectory.
By clicking the ![]() button you can transfer the block to the project. The block will be places in the middle of the room at a floor level. In order to change the block’s position you should at first select it by right clicking on it and choosing "Select object". Then you can move it to the desired position. You can set the block’s coordinates and rotation angles in the same way as you set them for 3d objects (see Placing 3dt and 3ds objects).
button you can transfer the block to the project. The block will be places in the middle of the room at a floor level. In order to change the block’s position you should at first select it by right clicking on it and choosing "Select object". Then you can move it to the desired position. You can set the block’s coordinates and rotation angles in the same way as you set them for 3d objects (see Placing 3dt and 3ds objects).
In contrast to 3DT-objects, you can’t select a block by double clicking on it with the left mouse button. Instead you should right-click on a block and select “Select Object”. If you double click on a block, you’ll select the block’s surface and not the block itself. If a surface consists of splines and radiuses, it will be selected and covered as a whole surface. Please note, that it is possible to cover hollow’s inner surfaces. It is also possible to cover hollows that have a form of circle or rounded rectangle.
After that you can transfer selected surface to the Cover Editor using the ![]() button. In contrast to walls, a contour is created on the block’s surfaces automatically, i.e. it is impossible to create an arbitrary contour by yourself. To delete a block you should select it and choose "Delete Object". To copy a block you should select it and choose "Copy Object". All blocks are copied with uncovered surfaces.
button. In contrast to walls, a contour is created on the block’s surfaces automatically, i.e. it is impossible to create an arbitrary contour by yourself. To delete a block you should select it and choose "Delete Object". To copy a block you should select it and choose "Copy Object". All blocks are copied with uncovered surfaces.
In order to load a block into the editor, you should at first select the block by right-clicking on it and selecting “Select object”. Then right-click on the block again and select “Edit block”. In the editor you can change block thickness, rotate block and save it to a file or transfer in back to project.